Which is your preference?
Hand drawing or using an app?
Drawing your own floor plans
Many people planning to renovate or a build a new home often like to play with plans before they commit to hiring a draftsperson or architect. The thought of drawing your own plans may seem like an impossible task, but why not give it a go?! DIY plans are not as difficult as you may think if you follow the 3 steps described below.
Step 1: Research
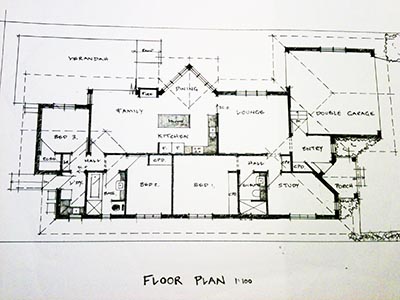
(i) You will need to understand who you are designing for. This may require a Client Brief. But if you already have a plan in mind, move straight onto rule 2. Remember you should add the wall thicknesses into your plans. Timber framed internal and external walls should be shown as 110mm think (this includes 90mm timber framing and another 20mm for internal linings and external claddings. Brick veneer and double brick are similar thicknesses and should be shown as 250mm.
(ii) Work out what spaces you need, how big they need to be and how they should relate to other spaces in the home. These help you with determining minimum room sizes read our articles about Table of Areas and Bubble Diagrams. Note that if you are using an iPad or iPhone app to create your own floor plan (like the one described in this article) they usually come with suggested room sizes that can be easily modified.
(iii) Read our e-book entitled Designing your own home (which requires that you subscribe to our monthly newsletter which we try our best to fill with useful new information).
Step 2: Drawing tools - get them ready!
(i) Electronic drawing tools
CAD packages. There are now plenty of easy to CAD packages available. But the reality is, there is a considerable learning curve in becoming proficient with these and you will be stuck at your computer.
Drawing apps. Drawing apps let the user draw anywhere, anytime! All you really need is an iPhone, an iPad or the equivalent. This does away with being connected to a computer, they also eliminate large cost outlay and all the mess of paper, pencils and rubber waste. With only a small number of these types of Apps available, a great example is Planit2D's floor plan creator, which works seamlessly on an iPad & iPhone, and costs less than your morning coffee.
(ii) Drawing by hand
What you will need:
Sketch paper. Don't buy expensive "Butter Paper" that the professionals use, baking paper works just as well & can be purchased from any grocery store.
A3 Drafting board. Plastic type drafting boards are compact, light and come with a fixed ruler. They cost around $180.
Adjustable set square. This item is an adjustable clear plastic triangle and is required to produce angled lines. This will need to be purchased from an art supply outlet. Cost, around $40.
Pencil. You don't need a specialised drafting pencil (but they do draw so much neater). A specialised drafting pencil is called a Clutch Pencil and they require graphite refills. They come in varying thicknesses and weights. If you do purchase a Clutch Pencil buy one with very thin lead refills otherwise you'll need to buy a special Clutch Pencil sharpener, just another cost that you don't need.
Eraser/rubber. White Stanley erasers are the best to use. These can be purchase from the supermarket or at your local art suppliers.
Ruler. You can use a regular ruler for drafting in 1:100 scale (1 cm = 1 metre). But if you want to draw the building at a smaller or larger scale you will need a Scale Rule. Scale Rules can be purchased only from drafting shops.
Step 3: Time to get busy!
(i) Quick design tips
- The entry should be at the front of the home and needs a space for storing bags and shoes.
- Internal and external living spaces should be located on the north side of your property. This will give your home great thermal comfort throughout the year.
- Outside living areas should never be on the south side of your home.
- Bedrooms need to be located away from noisy rooms.
- Locate garages on the south or west side of your home.
- Minimise hallways (just an extra cost you don't need).
- Also see our article of Seven Deadly sins of Home Design
There is a good chance while you're drawing that you'll get stuck on a plan that just doesn't work. Do not be afraid to throw away an idea if you can not get the form and function of the home working, it is only paper. iPhone/iPad apps like Planit2D, allow you to save your design ideas or plans at will. So don't be precious about your plans, but make sure you keep them all for ongoing reference.
(ii) Start drawing
It is often difficult to put pencil to paper when you start, so go back and take look at our Bubble Diagram. Create your own bubble diagram and then draw a floor plan using this diagram as a guide.
Creating your own plans for your renovation or new home can be really fun and rewarding. The plans you create can be used to accurately show a professional building designer what you are thinking, and cuts out the guess work for the designer.