Painting preparation is the most important part of any painting job. So... where do you start?
You need to consider what surface you are painting, the condition of the surface, whether it is interior or exterior, and the ultimate finish that you require.
Whether your surface is new or previously painted, the principles are similar. Your new paint needs to adhere to the surface properly, and the surface should be prepared to a good standard to ensure the desired finish.
The following list briefly summarises what you need to do:
- Hammer down all nails until they are flush with the surface to be painted
- Fill in all holes
- Remove loose materials
- Scrape away chipped or peeling paint
- Fill any gaps and undulating surfaces to ensure a smooth surface (unless that is not what you want)
- Sand the surface until it is smooth and uniform
- Clean the surface so that all dust, oil, grease or other contaminants are removed
Be aware of lead based paint and asbestos in older buildings. There are test kits for these available in hardware shops and online. If you find asbestos or lead you should hire a certified contractor.
Areas of high moisture such as bathrooms and laundries can cause paint adhesion problems. Long periods of dampness between the the paint and surface will cause peeling. Preparing for this by painting with a primer that is designed to be a water barrier is one answer. Reducing the cause as much as possible is another.

Protective gear
Wear protection for your eyes, nose and mouth. Be aware that even wood dust can be toxic or cause contact reactions. Manufactured woods can contain chemicals such as formaldehyde, arsenic and chromium. Protect yourself from inhaling any kind of dust by wearing a safety mask.
Preparation of existing painted surfaces
If you are painting over an existing painted surface it is important to test what the existing coating is so you can apply the right overcoat. The easiest and least expensive solution is to moisten a pad with methylated spirits, then rub the surface. If the existing paint softens or dissolves it is an acrylic paint and it can be painted with any acrylic coating. If the existing paint does not change, then it is likely to be an enamel based paint.
Enamel paints should be sanded, and painted with an oil based undercoat or primer. This can then be overcoated with an acrylic or oil based top coat.
It is recommended that surfaces that get a lot of wear, such as doors, windows, and frames have an oil based top coat because they are harder wearing.
If you find that the existing paint is enamel paint, it is a good idea to do a lead paint test. Lead paint was commonly used until the 1970's in Australia. A lead paint test kit can be purchased from a hardware or paint shop very cheaply. If you find lead paint, do not sand or disturb it - it is a major health hazard. Contact a certified contractor to remove it.
After you have completed the coating test, it is wise to perform an adhesion test to make sure that the under layers of paint are sound. Cut through the surface to be painted in a cross hatch pattern, then apply some masking tape over the surface. Press down well, then pull off. If any paint comes off, then you know that the surface is not sound enough to be painting over.
If you ignore this, you risk your work peeling off and wasting your efforts. It is a good idea to perform this test in a selection of spots that are to be painted. If there is any doubt, then the old paint work will have to be removed, and the new surface thoroughly prepared.
Dealing with peeling paint
The cause of the loss of adhesion should be assessed and, if needed, fixed. There can be several different causes:
- Moisture in the surface. The cause of the moisture should be removed to ensure that the new paint does not suffer the same fate.
- Different paint types. Acrylic paint over oil paint will often lead to a loss of adhesion.
- Low quality paint
- Poorly prepared surfaces. For example surfaces covered in dust or oil.
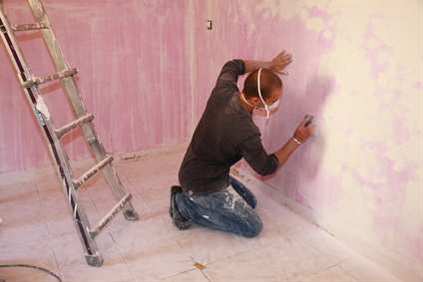
Peeling paint will need to be removed. Wire brushes, scrapers and heat guns are should be used before using sandpaper to smooth and feather the edges. When using a wire brush, be careful not to gouge the under-surface too much. A scraper will also do a good job of removing peeling paint. A wide bladed scraper will take off larger areas, and a detail scraper is used for loose paint in mouldings. Again, be careful not to gouge the surface when using a paint scraper.
A heat gun can be useful for softening paint for scarping. Be careful not to leave it too long in one spot as this can lead to a fire hazard and burning of the surface. Also, heating old paint that contains lead can vapourise the lead, so be sure to do a test on old paint.
Fillers
If your walls or surfaces have cracks or holes, then the time to fix them is before painting. Clean dust and any loose dirt away first with a brush or vacuum cleaner before applying the filler.
Wide cracks and large holes will need to be bridged with joint tape or mesh before applying the filler. The bridging gives support to the filler so that it does not slump into the gap.
A second application may be needed if the filler shrinks after drying. Where movement can occur, a flexible filler is desirable.
There are lots of different fillers with different properties for various jobs. For the most appropriate filler for your job, consult your paint or hardware shop.
Filler is applied with a flexible knife or applicator. Pack the filler into the gap or hole, then smooth off with the edge of the application tool. The instructions on the pack should give you a guide to drying times for the filler. It must be left to dry before sanding smooth.
Cracks are best filled using a caulking gun. It will help to get a good job if you cut the end of the tip at a 45 degree angle. After the caulking compound is applied to the crack, smooth it using a moistened finger or flexible knife.
Excess fillers should not be cleaned off into drains and sinks. Not only is it an environmental pollutant, it also may clog your plumbing as it dries.
Sanding before painting
Sandpaper is an integral part of getting the painting project ready. After you fill or spackle you must sand to get a professional finish. Sanding not only ensures a smooth, blemish free surface, it also helps paint adhesion.
Sanding will need to be done:
- for areas that have been filled, to make them level with the existing surface and to smooth the edges of the filled areas into their surrounds.
- for peeling, cracked or blistering existing paint. This is to remove any paint that is not adhering well, and to feather the edges of paint that is adhering so that it will be less obvious. The removal of paint that is not adhering well should be done with a coarse grade of sandpaper, and the feathering of edges with a fine grade of paper.
- to cut the surface of gloss paint, to help the adhesion of the next coat of paint. This should be done with a fine grade of sand paper.
Sandpaper comes in different grades, designated by numbers. Low numbers are coarser grade, and higher numbers indicate a finer grade of paper. Coarse grit paper works faster, but can cause gouges in the surface to be painted. Fine grit paper is slower because of the smaller particles, but will leave a smoother surface. The general rule is to begin sanding with a coarse grade of paper to speed the initial work, and then change to successively finer grades for finishing, cleaning all grit and dust off after each grade of paper is used, for the best job.
Electric sanders make the job quicker. Small detail sanders can be used for hard to reach areas. Small jobs can be done by hand, using a block to attach the sandpaper to, or even a piece of sandpaper if the job is really small, such as a couple of filled nail holes. A vibrating tool like an electric sander should be used no more than twenty minutes at a time. Also, be careful that you don’t gouge the surface when using a power sander.
If sanding wood, sand in the direction of the grain. Working across the grain can cause scratches in the wood. If you are sanding other surfaces, work in the direction that is most comfortable.
After sanding, be sure to wipe thoroughly to remove all traces of dust.
Be sure to wear protection against the dust. A dust mask and eye protection is a must. Wash hands after sanding.

Cleaning and washing before painting
This is a most important step in your painting preparation. It removes dust, mould, mildew, oils and grease as well as anything else that may affect your paint finish and adhesion.
Sugar soap is very effective on greasy substances, as it is alkaline in nature., but as it is somewhat caustic, be sure to wear protection for the eyes and skin. A comparable product in America is TSP, trisodium phosphate.
Warm water and detergent is also very effective, and cheap.
Change the cleaning solution as it becomes dirty, as it will only be serving to spread more dirt around, and be less effective. A sponge or plastic scouring pad can be used with the chosen cleaner. There are cleaning pads available with extension handles, these are quicker to use than having to move ladders around.
After washing down with the chosen cleaner, rinse the area with clean plain water, and let dry.
Pressure Washer
A pressure washer can make life a lot easier when it comes to cleaning down the outside of your home in readiness for painting. Other uses for pressure cleaners are cleaning your vehicle or driveways. So it can be handy to purchase one, or just hire it as you need. A high powered washer can take off loose and peeling paint, as well as just dirt, but do not rely on pressure washing as the only preparation. Sanding and scraping is also usually required. Also, be careful in using your washer, as it can do serious damage,including to people. Never place the tip close to surfaces.
Methods of protection during painting
Masking for a professional finish
Where two different areas come together, it is difficult, but not impossible to get a straight line if you are painting freehand. A steady practised hand can do a good job, but masking tape can make the job easier. It is good where the ceiling colour meets the wall colour, but also is useful to protect door and window trims, skirting boards, etc.
Hints for applying masking tape:
- The surface should be clean and dry before applying the tape. Any dirt or moisture will cause uneven adhesion of the tape, causing paint bleed.
- Do not stretch the tape when applying, as this can cause it to lift
- Press the tape firmly into place to achieve a good bond. This will help to avoid bleeding under the tape
- The paint should be touch dry before removing the tape. If it is tacky the paint can lift
- The time that tape is left on should be kept to a minimum
- A craft knife or razor blade can be used to gently cut along the edge of the tape to ensure a neat finish
- Remove with a controlled, even motion
- High heat can cause the masking tape adhesive to stick
- Do not use masking tape on delicate finishes
- Paint parallel to the tape, not at right angles
Drop sheets
Part of the preparation process involves protecting floors and other surfaces from drips, splashes, overspray from rollers and spills. Use drop sheets for ease of working. They should be attached to floors etc to avoid slips. Heavier drop sheets will be less liable to slip, but always be aware of drop sheets making the job site more hazardous. Light plastic drop sheets are inexpensive and easy to move around, but are more slippery. Remove as much furniture as possible before starting the job, too, to make less hazards around the work area.
Primers, sealers, undercoat
If you are just repainting over existing paint, with a similar type of paint, then primer is not needed. Primer is used to create a better bond, to even out the surface, to paint over where you have filled gaps, to save on top coats of paint, or if you are changing paint types. For mould prone walls, it is an excellent idea to paint with a primer that contains mould inhibitors. Primer is a must for painting bare wood or metal, or for very porous surfaces. Ask your paint retailer for advice on which primer you need for your specific job.
Painting cost calculator
Wondering what it will cost to paint your house? Why not try this painting cost calculator from Inspiration Paints?
Bunnings video - How to paint (step 1 of 9)