Paint the exterior of your house like an expert
Use our handy DIY step-by-step guide to achieve a professional finish.
Nothing sharpens the appearance of your house like a fresh coat of paint. You can tidy the garden, sweep the verandah, even re-pave the driveway, but if your paintwork is cracked and chipped, your house will still look tired. If your home is ready for some much-needed TLC, its time to take a look at some colour swatches and see what’s possible.
Keen to get started but frightened by the cost of hiring a professional painter? Doing it yourself can save thousands. Exterior painting can be a bit daunting, but as long as you have quality paint, the right equipment and a bit of know-how, you can have your house looking smart in no time. Here’s our step-by-step guide to painting success.
1 - Prepare your surfaces
Yes, preparation can be time-consuming, but it really does mean the difference between a impressive outcome and one that is so-so. Take a look at our preparation guide.
2 - Choose your paint
How many litres to buy?
You can estimate the number of litres you need by measuring each exterior wall and multiplying the height and width to calculate the area in square metres. Don't forget to subtract the area of doors and windows. Generally, one litre of paint will cover a surface area of 16 square metres, but you’ll need to allow extra for rough or porous surfaces.
Here is a convenient and helpful painting cost calculator from Inspiration Paints?
Choosing your colour
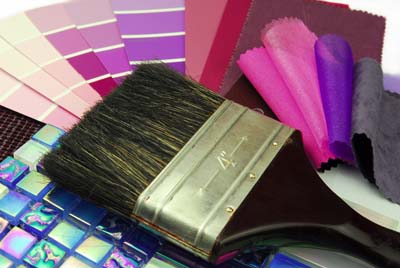
Where to start? There are so many modern shades to choose from. Do you want something bright and cheery, or more moody and sophisticated? Unlike interior walls, it is quite costly to re-paint if you change your mind, so it’s worth taking the time to ensure you are really happy with your choice. Consult the brochures of the paint manufacturers for inspiration, or consider hiring a Colour Consultant. You’ll be choosing at least two colours, one for walls and one for doors, windows and trims. Use sample pots to paint large squares of your top choices and observe the quality of the colour in different light throughout the day.
For more information read our article about selecting paint colours.
Finish
Generally, you would choose a Low Sheen Acrylic for large areas and a Gloss or Semi-gloss Acrylic for doors, trims and guttering. Many of the modern exterior paints have heat-reflective and UV-blockout properties. These paints can even improve your home’s insulation. Textured effects can be achieved with a great ranch of render paints. It’s best to have a chat to your paint retailer for expert advice.
For more information read our article about paint finishes.
3 - Get your hands on the right equipment
Paint rollers or Spray Gun
Rollers help you breeze through larger areas. Roller sleeves come in different nap lengths. A short nap leaves a thin smooth coating, but holds the least amount of paint. A medium nap gives a slightly textured effect, while a long nap holds the most paint and gives the greatest amount of paint texture when dry. Roller sleeves can be purchased very cheaply, however it pays to get better quality. Sheepskin roller covers are the best quality. Make sure you rinse and dry the roller to remove any dust or fibres before painting. Use solvent or water depending on the paint type. If you decide to use a spray gun, you’ll need to keep it level to achieve an even finish. Use a ladder to reach higher areas rather than pointing the gun upwards.
Brushes
Have at least one narrow and one wide brush. Synthetic brushes can often be the better choice.
Paint tray, roller ramp, or painters bucket
The old paint tray is still useful, but there are now products on the market that can convert any tin of paint into a roller tray. A roller ramp comes in various sizes and slides into the paint tin to form a rolling surface. No messy pouring! A painters bucket takes things to the next level. These rectangular buckets have an inbuilt ramp for the roller and a handle for easy carrying and hanging.
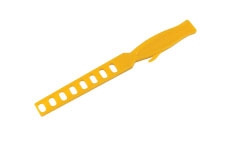
Paint stirrer
A specially designed stirring tool is a better choice than a piece of wood or your child’s school ruler. Get your hands on a flat plastic mixer (like a ruler with holes), a mixing paddle, or a round tool that ‘mashes’ the paint.
Ladder and Roller Extension Handle
You’ll need a tall, sturdy ladder to reach taller sections. If you have a double-storey house, you will probably need to hire scaffolding. An extension handle for your roller can increase your reach by up to 2 metres.
Rags
Keep a good supply of rags on hand to clean up spills and splatters as the job progresses.
Tape
Unless you’re confident you can achieve a straight edge, it’s best to use painters tape to cover edges. Yes, it’s a bit of work to lay the tape, but it makes painting much faster in the end.
Canvas drop sheet & protective clothing
Protect yourself and your garden from spills and splatters.
4 - Time to get started!
Choose your day
Avoid painting on days when rain is forecast, as this will inhibit the drying process. Also avoid any overly hot and windy days, as this can make paint dry too fast. Start painting on the shady side of the house and make your way around the walls, avoiding the direct sun. If a wall surface is very hot, you can cool it with a light spray of water before painting (except for Enamel paints that require a completely dry surface).
Prime surfaces
New, bare timber will require a primer, as will any metal surfaces, such as gutters or downpipes. Most modern exterior paints do not require a primer coat, but check the label to see if it required before proceeding.
Mix your paint
For optimum finish, all of the components of your paints must be mixed thoroughly before use.
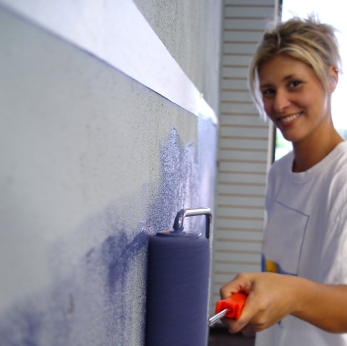
Roll or spray the large areas
Start from the top and make your way down. Take your time, as fast rolling can lead to splatters. Also be careful not to overload the roller with too much paint. Try to use an even pressure to get a uniform finish.
Paint edges
Use a brush to take the main paint colour to the edges. Use light, short strokes. You can roll over brushstrokes to even them out if necessary.
Paint windows, doors and trims
Use a brush to apply the accent colour to the windows and trims. This is where the tape comes in handy. Paint doors from outside in, making sure paint does not pool in the crevices of the moulding. It can be much easier to remove the door and place it on trestles first.
Need a rest?
If you want to set your rollers and brushes down for a few hours, wrap them in plastic to avoid drying.
5 - Clean up and store
Hammer down the lids on any leftover paint and store in a dry area. Take note of the brand and colour code, for easy ordering when it’s time to re-paint. Thoroughly clean and dry your brushes and tools.
6 - Admire your efforts!
Now it’s time to pull out a chair and appreciate all your hard work. Your house will be looking fresh, smart and inviting. Don’t be surprised if you see your neighbours pulling out their paintbrushes next weekend!
Bunnings video - How to paint (step 1 of 9)