Want to save money and tile your own floors?
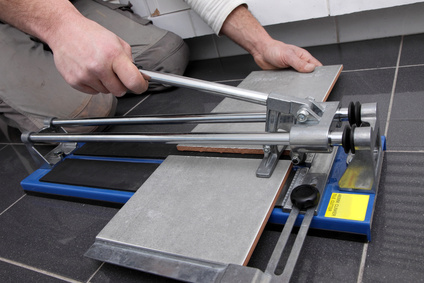
Inexpensive tile cutter
Below is a step-by-step process you can follow to tile your own floors. Once you get started you will find that most of the tiling process is quiet simple.
Planning
Planning is essential if you want a beautiful finish. Firstly do some homework and visit a few tile supply shops. They will be able to supply you with everything you need for your job, and they will also be able to refer professionals to you if required.
Choose a practical and appropriate tile
Ceramic tiles are easy to cut, cheap to buy and easy to lay. Choose a size of tile easy to lay - smaller tiles and more fiddly and large tiles can be heavy and cumbersome. 200 x 200mm & 300mm x 300mm tiles are the most cost effective. Ceramic tiles come in different finishes for different effects and uses. Flush (smooth finish) is for general use and virtuous (rough finish) is for the safety conscious. Choosing a virtuous tile will limit your choice in tiles.
Porcelain tiles take longer to cut, as they are far more porous than ceramic tiles. They are more expensive to purchase than ceramic tiles and cost more to lay than ceramic tiles because they are not generally as strong and need to be handled with care, which take longer. Ceramic tile come in flush or virtuous finishes.
Natural stone is exceptionally hardwearing, but avoid soft stones like Tavertine when your space has lots of 'corner turns'; e.g. tiled bath hobs, steps, tiled window sills and wall returns. Natural stone is at the top end of flooring in terms of cost. Natural stone can be finished in a few different ways:
- Polished. The stone is cut and polished for a high-gloss finish. Results in a very slippery surface, not good for floors.
- Honed. The stone is cut and sand-blasted for a smooth but non-glossy finish. Good for flooring and the safety conscious.
- Rough. The stone is cut and acid washed.
Choose your cornering method
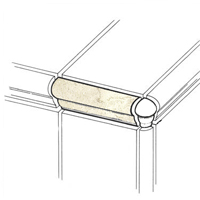
Example of a tile cap
(courtesy of Go4Floors.com)
Mitring. This method is far more time consuming but will provide tiled areas with the best finish. Mitring tiles requires heavy scoring with a drop saw and then angle grinding to a 45 degree angle to give a neat and strong tile edge.
Straight cut. This involves scoring the tile and then snapping it into two pieces. This can leave the edges rough, sharp and porous.
Tile cap. Capping is the quick way out for the DIY'er but can look really horrible if you don't keep it to a minimum or your tiled area has lots of turns. You can buy purpose made caps in long skinny tiles or in long lengths of PVC stripping.
To grout or not to grout?
There are two methods of joining tiles, grout joint or a butt joint.
A grout joint is a spacing between tiles of 3 - 5mm. Grout is the 'goo' between the tiles and it comes in many colours. Choose one based on these criteria:
- A colour that matches your tiles
- A colour that will not stand out with wear and watermarking.
A butt joint means there is no space between the tiles. This method is often used for natural stone and porcelain tiles. Butt joints give a tiled area a seamless look.
Research your set-out point.
So what is a set-out point? And why is it so important?
The set-out point is the spot in your tiled-area (e.g. your bathroom or kitchen floor) that you must select as being the starting point for laying tiles.
One of the biggest mistakes that DIY tilers (and many tilers for that matter) make is choosing the incorrect a set-out point. Many professional tilers, DIY book and articles will tell you that you should use the centre of the room. They are wrong. You need to choose the set-out point based on the visual focal point of the room; e.g. from the bathroom door. There is nothing more displeasing to the eye than entering a tiled-area and seeing cut tiles.
Preparation

Floor tiles & concrete bench
Once you have chosen your tiles it is time to prepare the surface of your floor structure. If you are renovating a bathroom you will need to ensure the floor structure is sound before you start. You will need to:
- 'Fit-off' all plumbing and electrical services in the bathroom.
- Remove all sanitary fitments.
- Remove all wall and floor linings and get the entire structure inspected by a professional builder, architect or engineer. Once your floor has been inspected mark down where all your new sanitary fitments are to be located. Remember it is more cost-effective to leave fitments in existing locations.
Leveling. It is imperative at this time to work out the depth of the entire tile-bed so that there very little 'step-up' onto you tiled area. Remember most standard houses are constructed with the same structural floor level throughout the entire house, allowing for no step-down to accommodate the tile bed.
You will need to calculate the total thickness of your tiled floor at the wet-area door, and to include: tile thickness (e.g. 7mm) plus tile glue (1mm) plus cement bed (20mm) plus fibre cement linings (12mm). If, for example, you calculate that you have a total of 40mm in floor thickness, you need to be aware that it can be a tripping hazard and you will need to cut the thickness down to at least 25mm. You can accomplish this by doing research on different products or by reducing the level of the floor structure. Engage a professional for floor level reduction. When the level of the floor has been finalised, lining can begin.
Lining. New fibre cement sheeting will need to be to all walls. Non-concrete flooring will required compressed fibre cement sheeting to comply with Australian standards for loads.
Waterproofing. All internal areas that will see water use are called wet areas and will require waterproofing. The standard for waterproofing your tiled-area will vary depending on room use. Bathrooms, for example, will need to have the highest level of waterproofing (refer to the latest Australian Standard on water proofing). There are water-proof professionals and it is highly recommended you don't do this yourself. Don't forget that tile expansion joints, shower set-downs, door thresholds and bath hobs will need to be factored into the bathroom before the waterproofing membrane is applied.
Once the waterproofing is totally dry and has been certified by a professional you are ready to start creating a base for your tile bed.
From this point forward you must be very careful with the waterproofed surface until it is totally covered in the tiles. Items that can easily pierce waterproof membranes include tiles and. All tiles and tiling equipment should be stored in another space until required. If you do take anything into this space ensure it is placed onto a protective mat of some kind.
Create a base & fall in your floor. If you are tiling a bathroom floor it will need a fall to meet Australian Standards and to avoid internal flooding. You will need to check with your council for current complying floor falls - but a 10mm fall over 1000mm can be used as a guide. Ensure the cement is thick enough in all areas to avoid cracking (i.e. a minimum of 20mm).
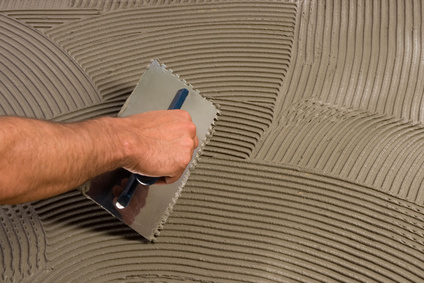
Trowelling the tile adhesive
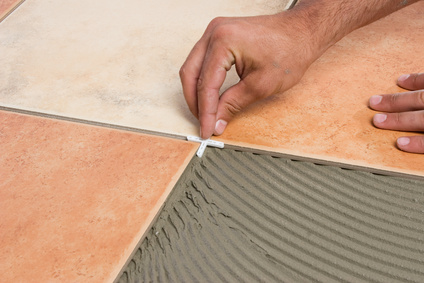
Using tile spacers
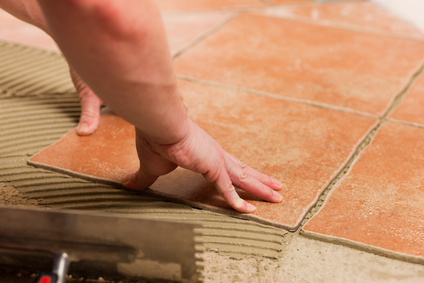
Laying a tile
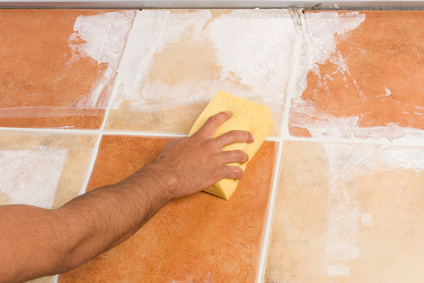
Cleaning off excess grout
Tile installation
Now the fun bit - you are ready to start tiling.
Dry-lay (tile without glue) one row of your tiles horizontally from the set-out point and the other adjacent to this row. This will allow you to see how the tiles are going to fit within the tiled space and which tiles need to be cut. Make sure you allow for 3mm grout (use a tape measure & tile spacers to be precise). You can play with the joint spacing and allow 2 - 5 millimetres of grout between tiles to avoid skinny cut tiles, but keep the joints uniform. If it looks like you will need to cut a tile, make sure you move this tile to a less noticeable place like behind a door.
Trowelling the tile adhesive
Make sure you have chosen the recommended adhesive. Your tile supplier or manufacturer should advise on you which adhesive to use. One side of your trowel will have markings or notches. Use this end to apply the adhesive to the floor. This will give it a striped or grooved appearance. Place the first tile on the adhesive and wiggle it back and forth to ensure it is in position. Then lift the tile and examine its bottom. If the adhesive is not evenly spread over the tile adjust the thickness of your adhesive making sure there is enough, then replace this first tile in its correct position. Do not forget to twist and wiggle the tile to ensure a solid and accurate fit.
Only lay two or three tiles at a time. Follow the lines you have drawn to ensure the tiles are in straight lines. If adhesive oozes up between the tiles when you press them into position you are using too much adhesive. Adjust the amount of adhesive accordingly. As you add each tile, use tile-spacers. These are removed just before you place the grout between the tiles.
To cut tiles accurately and cleanly you will require a tile-cutter. These can be purchased from a hardware store such as Bunnings or Mitre10 for anywhere between $20 and $100.
Curing
Tiles must be allowed to cure for several hours, usually overnight. The manufacturer of the adhesive will have a recommended cure time. Do not walk on the tiles during the curing process, it will displace them. It is important to start tiling away from the door - and then working your way back to the door.
Grouting
Prepare the grout according to the manufacturer's instructions. Grout has a thick, not a thin, consistency. There are many colours of grout and you can even change the colour to suit your tiles. Use a trowel known as a rubber float and work the grout into the spaces between the tiles on an angle. This enables the grout to be pushed deeply into all spaces.
Clean-up
Do not delay - use a damp sponge and wipe away all the grout on the tiles. Do not remove the grout between the tiles. Constantly wash the sponge. Have a bucket of clean water at hand and regularly rinse the sponge, and just as you had to cure the adhesive when laying the tiles, so too you must cure the grout. The manufacturer of the grout mixture should have instructions on how to cure their product. It might mean carefully spraying the grout with a spray of water each day for a few days. Again avoid walking on the tiles wherever possible. The final step in the curing of the grout is to apply a sealant. This will prevent water seeping in under the tiles via the grout.
Finishing
All tiled floor areas should be sealed before use and there are different sealants for different purposes. General sealants minimise water penetration, but there are others that offer extra floor grip and total water penetration (epoxy coating).
More tiling information
Mitre10. Tile your own floors brochure (free).
Bunnings. DIY Tiling booklet ($2.98).
Further reading
DIY attached carport. Save money and learn how to build your own attached carport
DIY deck. Building a timber or wooden deck is really not that hard if you keep it simple.
DIY paving. Learn to lay your own pavers in 4 easy steps.
DIY portal. A collection of useful links to online DIY resources.
DIY retaining walls. Unfortunately constructing a retaining wall is not a small job, but if you are willing to do some digging and lifting, and enjoy working in the garden, it is manageable as a DIY project.
DIY timber steps. Learn how to build your own timber steps.
DIY wall decals. Install your own removable wall decals - its much easier than wallpaper.
DIY wallpaper. Gone are the days when you hear the word wallpaper" and you think of old English homes with a faded floral brocade on every wall. Read this article for modern alternatives.
How to read plans. Read this article to learn how to read construction plans
Repairing holes in plaster. One of the common problems people undertaking a home DIY project will encounter is repairing holes in plaster But repairing them is surprisingly easy
Selecting flooring. Choosing the right floor for you in 4 easy steps.