
Green wall by Michael Hellgren (Sweden)
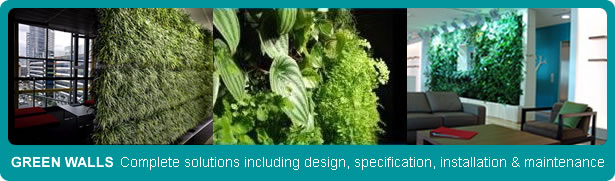
Often referred to as a "vertical garden" a green wall is simply a set of garden beds arranged to look like a wall. Green Walls are a relatively new trend, that are both space efficient and beautiful.
Green walls are a great alternative for small backyards. Many new developments now see green walls specified by building designers and architects as the walls can become an integral part of the house design, not only offering produce but also providing shade, privacy and natural cooling to the dwelling.
Vertical Gardens by Junglefy
Junglefy is an Australian company that provides green wall and green roof solutions and its easy to install your own green wall. Below is a step by step guide on installing your ECOVERT™ green wall.
1. What you get in your ecovert box
Open the box carefully. Your DIY ecovert Home Wall system will contain the following:
- Ecovert home frames (h 1100mm x w 40mm x d 122m)
- Ecovert home modules (h 547mm x w 334 mm, x d 122mm each with 15 holes)
- Compressed growing media (bricks of coconut fibre)
- Growing bags
- White pill box
- Wetting agent and bio juice
- Galvanized screws and washers for frames, black screws for modules
- Instruction brochure
You will also need :
- A piece of rigid 15mm thick marine ply cut to size against which the installation sits.
- Wood bolts (or for masonry, expanding masonry bolts and nuts) to fix the marine ply to the wall.
- Spirit level, drill and bits, Phillips head screw driver or grabber gun, pencil, scissors, water can or supply.
2. The backing board
The frame sections of the ecovert system needs to be fixed onto a piece of rigid (black or dark brown) 15mm thick marine ply. (Your local timber supplier will be able to cut this to size.)
To determine the shape and dimensions of the ply, either:
- Measure the width of a fully assembled unit.
To work out the exact dimension it must be, lay the left hand frame out on the ground and insert the first module. Then tuck the next frame into position on the RHS of the module. Repeat the process for all your modules. Measure the entire assembled unit. - Measure the width from the parts.
The height of the installation is the sum of the module heights
The width of a single module plus the two frames either side is 514mm. For each additional module and frame add 374mm. - Add overlap of backing board (if required)
Its your choice whether you want the backing board flush with the installation, or very slightly bigger on each side. If you want the backing board to be 15mm bigger on each side, the ply becomes a total of 30mm wider and longer than the installation.
3. Loading up the ecovert™ module with compressed bricks
- Take the media bricks from their bag. Break the bricks exactly in half. Two are required for one module, but one of the halves needs to be trimmed to allow for expansion. Using a kitchen knife and rule, cut 1 cm off one of the longer sides.
- Hold the module upright and insert the growing bag inside the module. Make sure the bottom of the bag is pushed down to the bottom of the module and the bag is not twisted or bunched up.
- Still holding the module upright, insert the compressed growing bricks side by side (narrow edges together) into the bag so that they fill snugly in the bag.
4. Hydrating your ecovert™ completed modules
- Lay the plastic sheet in the base of the box so that it extends all the way up the sides to create a watertight bath.
- Take the box outside and fill with 30mm of water.
- Pour half the wetting agent (white pill box) and of the bio-juice into the water and stir.
- Take the module loaded with compressed brick and submerge it in the liquid, with the holes facing down. The bricks will swell. Leave for 15 minutes then turn the modules over to hydrate the back. Ensure that the brick is fully hydrated i.e. damp both sides.
- Stand the modules upright for 10 minutes in the bath but above the liquid to allow excess liquid to drain out the bottom holes and back into the watertight box.
- Repeat the hydration process for each module.
- Pour any of the remaining water into a bucket for later use or watering..
- While the modules are hydrating and draining it is a good time to install the backboard and frames.
5. Installing the ecovert™ frame and modules - locate the best wall position
- Locate a sheltered position on a sturdy wall. (If necessary ask a builder or other professional about suitability of the chosen wall.) A north or north east facing wall is ideal.
- Locate the maximum height of the installation on the wall. It should be low enough so you can just reach the top row and pour water into the top using a hose or watering can. Mark this height with a pencil.
- Mark a point on the wall where the left hand edge should be. Using a spirit level extend that line up the wall. (It is essential this be absolutely vertical. The module must be level to ensure even water distribution.)
6. Attach the backing marine ply backing board to the wall
How you attach the plywood to the wall depends upon the material the wall is made from.
- Fibre Cement Walls
- Drill 4-6 holes (depending upon the boards size) into the marine ply for expanding the masonry bolts to poke through.
- Position the ply against the wall and mark the position of pilot holes on the wall with a pencil.
- Finish drilling out the holes in the wall with the correct size masonry bit. (Use bit with same size drill diameter as shaft of the expanding screw bolts (e.g. 6mm) to a depth of the red plugs that come with the expanding screw bolts. Make sure you are accurate with your drilling.
- Insert the plug into the holes.
- Position the ply on the wall again, insert the expanding screw bolts and tighten so that the ply is now secure against the wall.
- Timber/plywood walls
Use the same method as for masonry walls but use sturdy hexagonal head screw bolts instead of the expanding masonry screws bolts.
7. Attach the frame to the backing board
- If are insetting your frame from the edge of the backing board (say 15mm), draw a line up backing board where the left hand edge of the frame should be. Check this line for vertical-ness with a spirit level.
- Place the bottom left frame section against the vertical line you have drawn and mark the position of the screws in the slits.
- Remove the frame, using a very thin drill bit, drill pilot holes for your screws exactly over your mark.
- Hold the frame up to the ply against your vertical mark and secure with the supplied screws and washers.
- Repeat for additional frames that sit directly this one on the left hand edge.
- Hold the left side of the module against the frame and position the right hand side frame under the right hand side of the module.
- Mark pilot hole positions for the screws in the groove with a pencil.
- Remover the module and right hand frame and drill the pilot holes with a very thin bit.
- Position the right hand frame section over the pilot holes and secure the frame section to wall with screws and washers supplied.
- Repeat for additional frames sections.
8. Planting ecovert™ green wall or vertical garden module
- Place your drained ecoVert™ home modules onto a flat surface. Use the empty box and the plastic to keep things clean.
- Start the planting of the modules from the bottom as this will allow you to push the coconut fibre firmly around the planted plants from the above holes.
- Using a sharp knife or secateurs make a horizontal slit in one of the bottom row of holes.
- Using your fingers or a screw driver pull the bag material apart a little to make a hole in the growing media big enough to receive your seedlings.
- Tease the soil around the seedlings roots i.e. make sure they hang freely and brush excess soil from them.
- Place the seedling into the hole, taking as much care as possible to minimise damage to the roots. Do not plant deeper than the existing soil depth as this can cause stem/collar rot.
- Using a screwdriver (or long chop stick) gently push the coconut media back around the roots. Then use your fingers to lightly compress the coconut fibre and create a firm fit for the plant. Do not be too firm otherwise you could cause unnecessary damage to the roots.
- Continue planting from the bottom upwards until you reach the top.
- Before you reach the top row, stand the module up as this will make things easier.
- When you reach the top you may need to use the extra loose coconut fibre to fill the module to the rim. Hydrate this media in any of the remaining water.
- Sprinkle a tablespoon of the fertiliser along the top of the module and lightly mix in.
- Trim off any excess bag to the top of the module.
- Place the planted module in the box with the plastic.
- Using the watering can, gently pour the water over the top of the module. This will allow the plants to settle in.
- Repeat theses steps for the rest of the modules.
- It is a good idea to leave the plants in a semi-shaded position for the first three days to allow the plants to acclimatise to their new position. Ensure you water on a daily basis. (Do not leave the modules sitting in a pool of water.) If the wall can be shaded you could mount the modules immediately.
- The plastic you have lined your box with is fully biodegradable and can simply be dug into your garden or placed in your green waste collection bin.
9. Mounting your ecovert™ vertical garden modules
- Slide the first module into the bottom section of the capsule. Use four of the black nylon screws and washers to fix the module in place. Screw t hese into the four stainless steel holes around the perimeter.
- Place the second module above the first and insert the remaining screws.
- Your have now completed the installation and are ready to watch things grow.
10. First time watering after mounting
- Fill a watering can provided with water from your tap.
- Insert the nozzle into the slot at the top of the top module and move it from side to side to distribute the water evenly. Repeat this process twice.
11. Fertilising
- Add a capful of the Biojuice to your watering can every fortnight
- Every two months add a half handful of the organic slow release fertiliser to the top of each module remembering to mix it into the top layer. If it is not mixed in it will form a crust and reduce the ability of the water to penetrate the growing media.
TIPS on building an amazing vertical garden
- Use plants with higher water requirements such as mint, lettuce and strawberries along the bottom of the modules.
- Choose plants that prefer drier conditions such thyme, sage, oregano and rosemary for the top of the modules
- Try to choose a position that reduces exposure to the hot westerly sun.
- The ecoVert™ Home is subject to extreme temperatures like regular pot plants. If weather is forecast to be particularly hot and your ecoVert™ Home is exposed to sun all day then it may be worth considering shading the green wall or removing the modules and placing them in a s haded position till the weather passes.
- It may not be necessary to plant every hole. This will depend on the mature size of the chosen plants.
- Hanging plants such as strawberries are likely to shade and smother plants below them therefore it may not be necessary to plant the hole below.
- The ecoVert™ Home Green Wall will use more water at the beginning whilst the plant coverage is minimal.
- Parsley is particularly susceptible to wilting so extra care will need to be taken at the time of planting.
- The plants in the ecoVert™ Home Green Wall are susceptible to pests and diseases like any terrestrial plants. Keep a close eye on these in the warmer months. There is a fantastic range of organic pest and disease treatments available. Please check with your local nursery to see what they have available.
Tips From Ozbreed - Choosing The Right Plants For A Green Wall

Choosing the right plants for a green wall is one of the most important secrets to success. Most plants don't work for long. They either die out if the wall is too wet or dry, look untidy quickly, or cannot handle the blaring sun or heavy shade. Many plants tend to grow out or up and do not suit green wall construction. Ornamental plants can be a lot tougher for green walls and require a lot less maintenance than herbs and vegetables.
So, what are some of the best plants to use in green walls?
For heavy shade or full sun, wet or dry, you cannot go past Liriope. They will not let you down. If they ever look untidy, simply cut them back. All of these plants work Australia wide.
Just Right® Liriope muscari 'LIRJ' PBR is a more evergreen plant and has a weeping habit in a green wall.
Amythyst™ Liriope muscari 'LIRTP' PBR is a compact plant with dark green foliage which contrasts with stunning deep purple flowers.
Isabella® Liriope muscari 'LIRF' PBR is a compact dense fine leaf plant with beautiful pink flowers.
Silverstar™ Liriope muscari 'LIRSS' PBR is a plant with delicate cream and green variegated foliage that looks almost silver from a distance.
Pink Pearl™ Liriope muscari 'VS0001' PBR is a compact low growing plant that is sun and shade tough and has very clean, elegant green and cream variegated foliage.
Click here for more information on these Liriopes.
For full sun to moderate shade, wet or Dry, two Lomandra types stand out. While most grow up or out and do not work, both of these weep rather than grow out. Shara™ Lomandra fluvialtilis 'ABU7' PBR and Tropic Cascade Lomandra hystrix 'LHWP' PBR weep beautifully.
Blush™ Nandina domestica 'AKA' PBR and Obsession™ Nandina domestica 'SEIKA' PBR grow well in green walls, and add a little red colour.
There are only two Westringias that look at home in a green wall and they are Grey Box™ Westringia fruticosa 'WES04' PBR and Mundi™ Westringia fruticosa 'WES05' PBR the only two that can handle too much watering.
For foliage colour (if the wall is adequately watered) then Little Ruby™ Alternanthera dentata 'LRU30' PBR will provide deep rich purple foliage.