


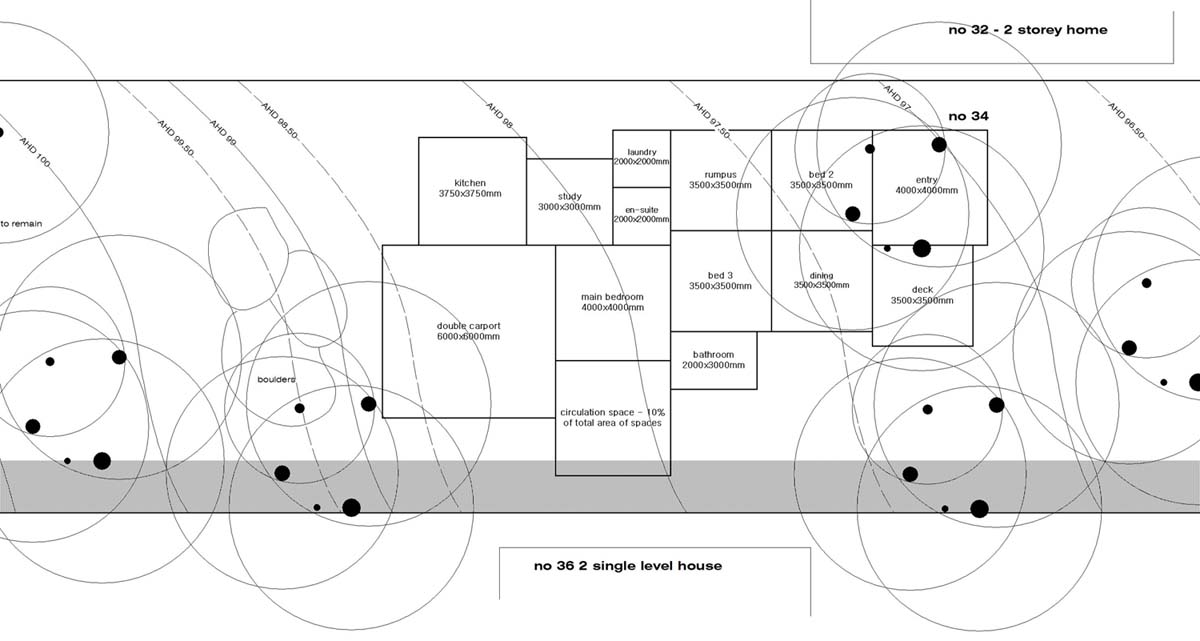
In the early stages of design it is essential that you create a diagram or table, to visually demonstrate the design. This gives you an immediate 'visual' of the size and location of spaces within the proposed building, on the proposed site. This visual relationship of external and internal areas will keep you on-track and working towards a well design home.
A simple site plan with boundary lines and any dominating elements should be drawn alongside the schedule of areas so that the building spaces can be seen in relation to the space available on the site, and demonstrates how this may challenge the clients brief and local council requirements. The shape of the 'boxes' representing the dwelling spaces is irrelevant - they are only indicative for their comparative size.
Example table of areas
Move the cursor over the table of areas below to magnify it.
Related articles (9 steps of home design)
DIY Home Design (main page) Step 2. Performance specification Step 4. Table of areas (this page) |